Why Did the Aurora Borealis Look Better Through a Camera Than to the Naked Eye?
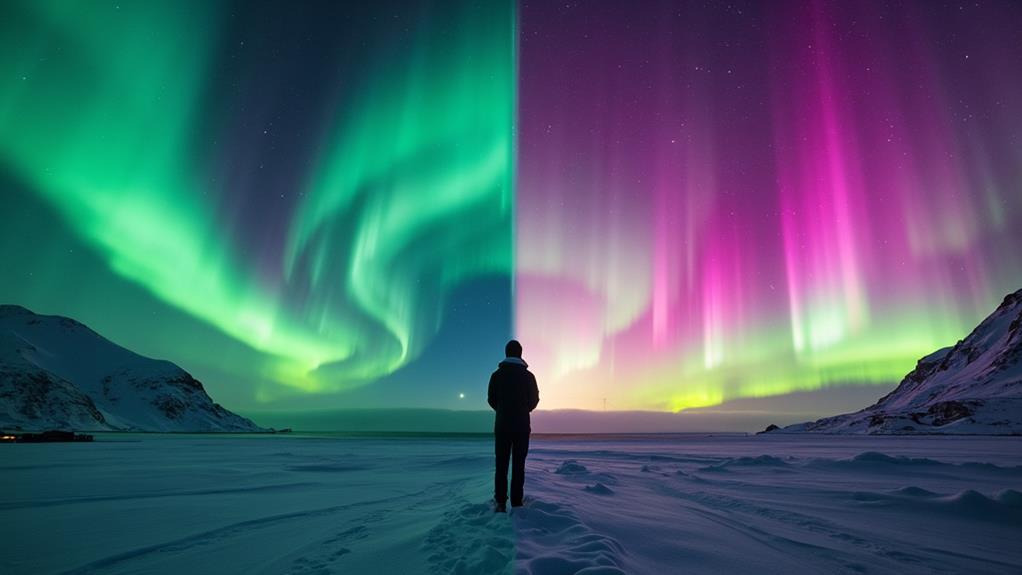
Have you ever wondered why the Aurora Borealis appears more vibrant in photos than when you see it in person? It's not just your imagination—cameras have distinct advantages over the human eye in capturing this natural phenomenon. While our eyes rely on rod cells in low light, which are less sensitive to color, cameras can adjust ISO settings and utilize long exposure techniques to reveal colors and details hidden to the naked eye. Modern sensors and post-processing further enhance these celestial displays, making them appear even more spectacular.
The Science Behind Auroras
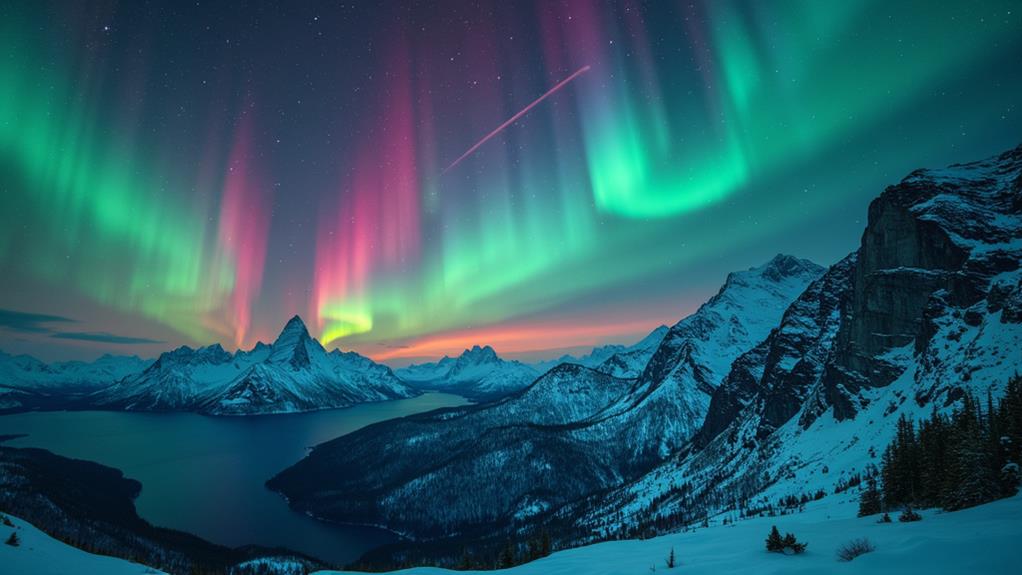
The Aurora Borealis, commonly known as the Northern Lights, illuminates the night sky through a fascinating interaction between solar wind particles and Earth's atmosphere. When these charged particles collide with gases such as oxygen and nitrogen at altitudes between 80-250 miles (120-400 km), they produce stunning displays of light. The colors—greens, reds, and blues—depend on specific atmospheric interactions. For instance, oxygen at lower altitudes emits green light, while oxygen at higher altitudes gives off red light. Nitrogen interactions result in blues and purples.
The human eye isn't as sensitive to certain light wavelengths, so auroras might not appear as vivid in person. However, cameras with long exposure settings can gather more light, revealing details and enhancing colors that your eyes might miss. The brightness of the aurora can be similar to moonlight, affecting your perception. By adjusting camera settings like ISO and exposure, you can capture the full spectrum of light.
For the best aurora experience, visit high-latitude regions during winter months, ideally between 10 PM and 2 AM, under clear, dark skies.
Human Eye Limitations
Despite the breathtaking beauty of auroras, your eyes might not fully capture their vivid colors due to inherent limitations. The human eye has two types of photoreceptor cells: rods and cones. Rods are more sensitive in low light but don't detect color, while cones require more light and are responsible for color vision. At night, your vision is dominated by rod cells, leading to a muted, grayscale perception of the aurora.
It can take roughly an hour for your eyes to fully adjust to low-light conditions, during which time your perception of colors and details diminishes. Bright artificial lights can disrupt this night vision adaptation, making it harder to see the full spectrum of auroral colors with the naked eye. Moreover, light pollution can hinder the adaptation of your pupils to darkness, reducing the visibility of fainter auroras.
Here's a quick comparison to illustrate these limitations:
| Factor | Effect on Vision |
|---|---|
| Photoreceptor Cells | Rods dominate, leading to grayscale vision |
| Night Vision Adjustment | Takes about one hour |
| Artificial Lights | Disrupts color perception |
| Light Pollution | Hinders pupil adaptation, reduces visibility |
Understanding these human eye limitations can explain why auroras often look more spectacular in photos.
Camera Sensitivity to Light
Understanding the human eye's limitations helps explain why cameras often capture auroras more vividly. Camera sensors are significantly more sensitive to light than the human eye, enabling them to pick up the vibrant colors and intricate details of the Aurora Borealis. While our eyes struggle with low light and contrast, cameras can use high ISO settings to enhance light intake, resulting in clearer and more colorful images.
Setting your camera to a high ISO allows it to capture more light even in dim conditions, which is crucial for photographing the aurora that often appears faint to the naked eye. Additionally, cameras can handle long exposure settings, allowing them to gather light over an extended period. This capability enables cameras to capture the dynamic colors and patterns of the aurora that might be missed by the human eye.
Modern cameras also utilize advanced digital sensors and computational photography techniques to enhance colors that might otherwise be muted or invisible to the naked eye. Therefore, when photographing the Aurora Borealis, your camera's heightened sensitivity to light makes the display appear more striking and detailed than what you naturally perceive.
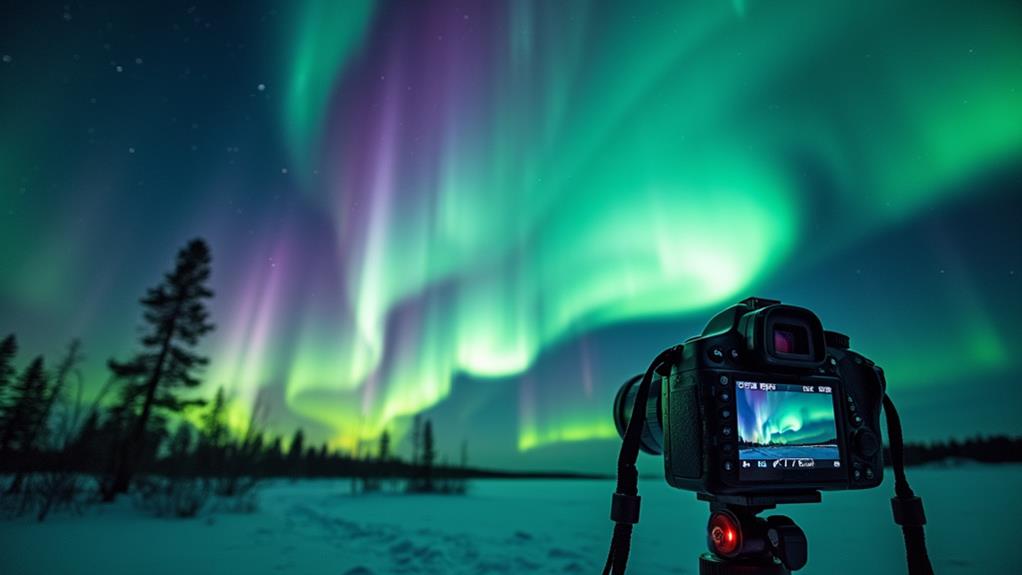
Long Exposure Photography
Long exposure photography captures the ethereal beauty of the aurora borealis in ways the human eye cannot. By using slower shutter speeds, typically ranging from 10 to 30 seconds, your camera gathers more light and detail than is visible in real-time. This technique reveals vibrant colors and intricate patterns in the aurora that are often muted to the naked eye.
To master long exposure shots, keep your camera's shutter open for extended periods. This compensates for low-light conditions, revealing details and subtleties in the aurora's movement. A tripod is essential for stabilizing your camera, preventing blur from any shakes, and ensuring sharp images of dynamic aurora displays.
Adjusting your camera's ISO settings during long exposure can further enhance image quality by increasing sensitivity to light. Higher ISO settings help capture the full spectrum of colors in the aurora borealis. So, next time you're out chasing the northern lights, remember to use a tripod, tweak your ISO settings, and experiment with shutter speeds to unlock the full visual potential of this natural wonder.
Color Variations Captured
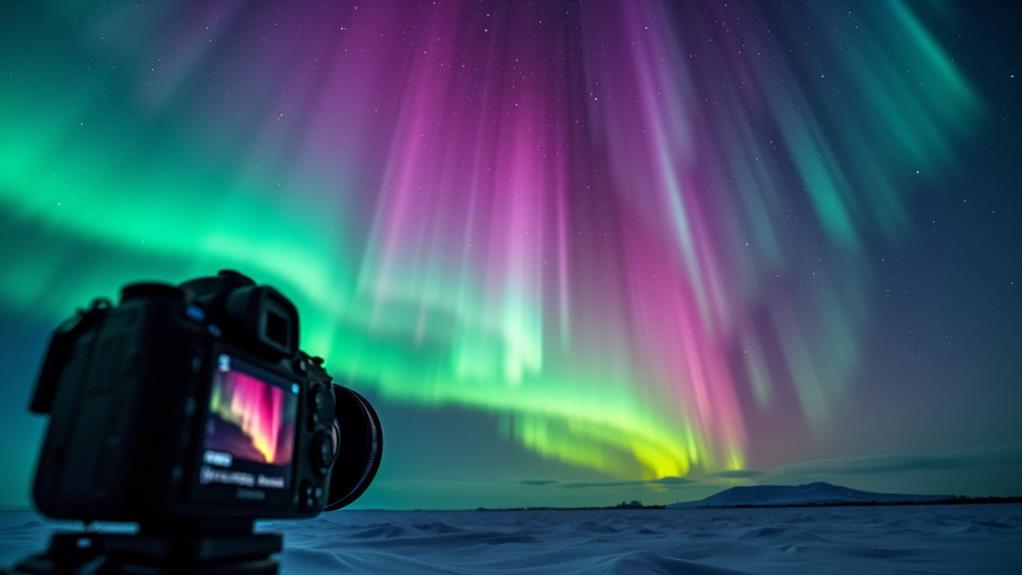
When capturing the aurora borealis with a camera, you'll discover an array of colors often missed by the naked eye. The camera's ability to gather and process light, especially through longer exposure times, reveals more vivid and diverse hues. The commonly seen green, due to oxygen at lower altitudes, becomes more intense, while reds at higher altitudes display the full spectrum of charged particles interacting in the atmosphere.
Your camera can also reveal rare deep blues and purples, stemming from nitrogen interactions during intense solar storms. These hues are typically invisible to the human eye, which is less sensitive to certain light wavelengths. The camera's sensor, however, beautifully captures these subtle variations.
Here's what you might capture with your camera:
- Green: From oxygen at lower altitudes.
- Red: From oxygen at higher altitudes.
- Deep blues and purples: From nitrogen during intense solar storms.
- Enhanced colors: Even under bright moonlight or light pollution.
- Subtle details: That your eyes might miss due to lower light sensitivity.
Impact of Light Pollution
When capturing the Aurora Borealis, light pollution is a significant obstacle. Artificial lighting generates a sky glow that obscures the auroras, making it essential to seek out dark, remote areas for optimal views. By avoiding regions with heavy light pollution, you enhance your camera's ability to capture the aurora's vivid colors and full intensity.
Sky Glow Reduction
Artificial lighting from urban areas creates a bright sky glow that significantly hampers our ability to view celestial wonders like the Aurora Borealis. This phenomenon, known as light pollution, considerably reduces the visibility of auroras, making them appear dimmer and less colorful to the naked eye. Pupil constriction in brightly lit environments further diminishes your ability to gather light, complicating the perception of these stunning displays.
To truly appreciate the Aurora Borealis, consider the following:
- Light Pollution: Artificial light obscures the night sky, making it hard to see faint auroras.
- Pupil Constriction: In brightly lit areas, your eyes can't adjust properly, reducing the visibility of auroras.
- Optimal Viewing Locations: Being in a dark location allows your pupils to relax and take in more light.
- Use of Cameras: Cameras can capture more light and colors than the human eye, revealing the aurora's full brilliance.
- Impact on Fainter Auroras: Areas with light pollution make fainter auroras almost invisible to the naked eye.
Choosing dark locations far from city lights enhances the natural beauty of the aurora, allowing you to see more vivid colors and dynamic displays. While cameras can help capture these phenomena, experiencing the aurora in a dark, pollution-free environment is unparalleled.
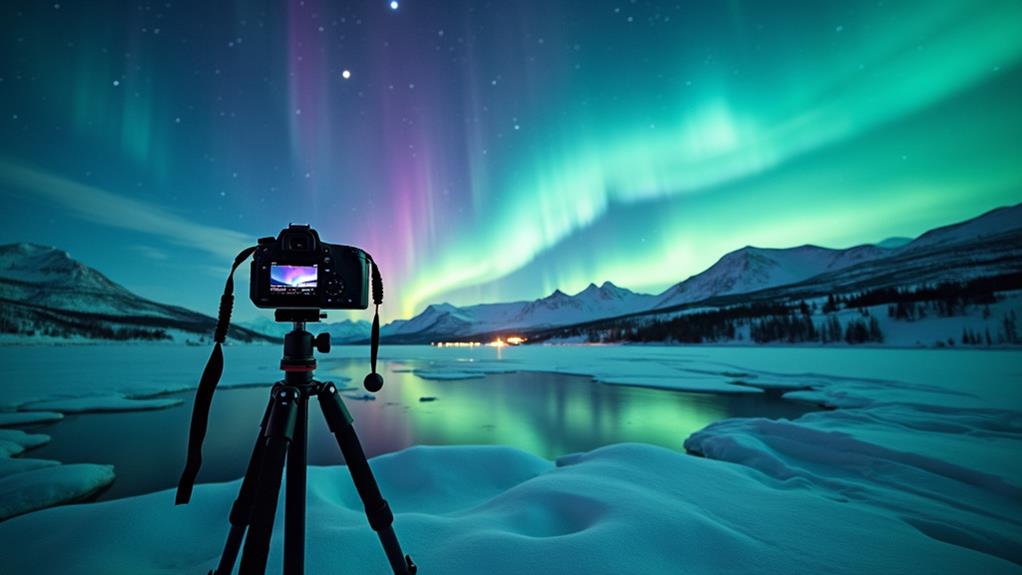
Optimal Viewing Locations
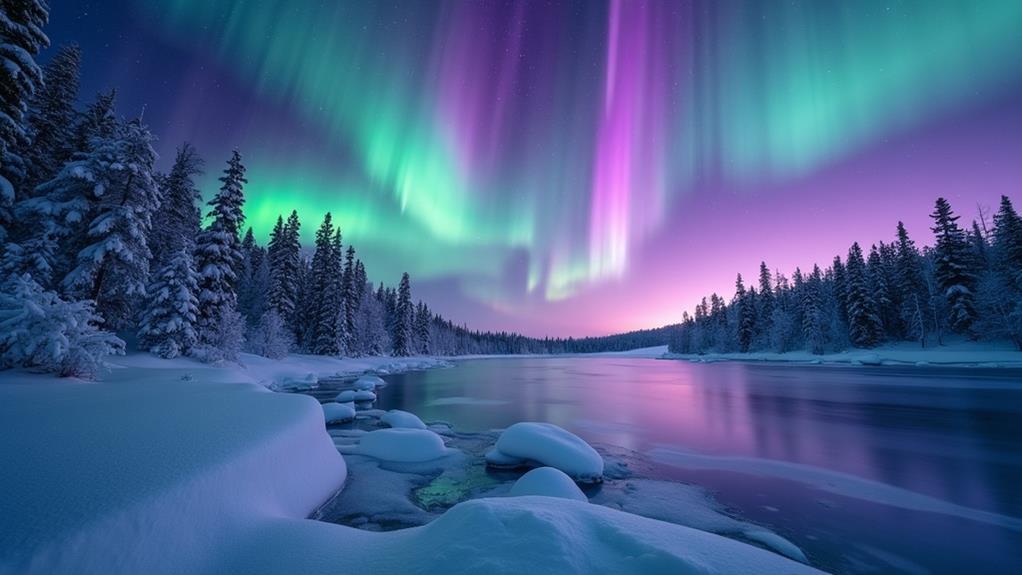
To witness the Aurora Borealis in its full splendor, it's essential to escape light pollution by heading to remote, dark areas far from urban lights. Urban light pollution creates a bright sky backdrop that obscures fainter auroral displays, making it vital to seek out ideal viewing locations.
High-latitude regions, such as Tromso in Norway, offer some of the best chances to see the aurora due to their proximity to the magnetic pole and minimal light pollution. These areas provide the dark skies necessary for capturing the auroras in their full glory. Even slight light pollution can diminish the impact of vivid auroral displays, so it's important to avoid places with excessive artificial light.
Clear, dark skies are a must for observing the northern lights. Outdoor lighting contributes to sky glow, further reducing your chances of seeing the aurora clearly. To truly experience the spectacle, you need to be in a location where natural darkness allows for better light intake. Ensuring you're in an ideal viewing location will make all the difference in your aurora-chasing adventure.
Optimal Viewing Conditions
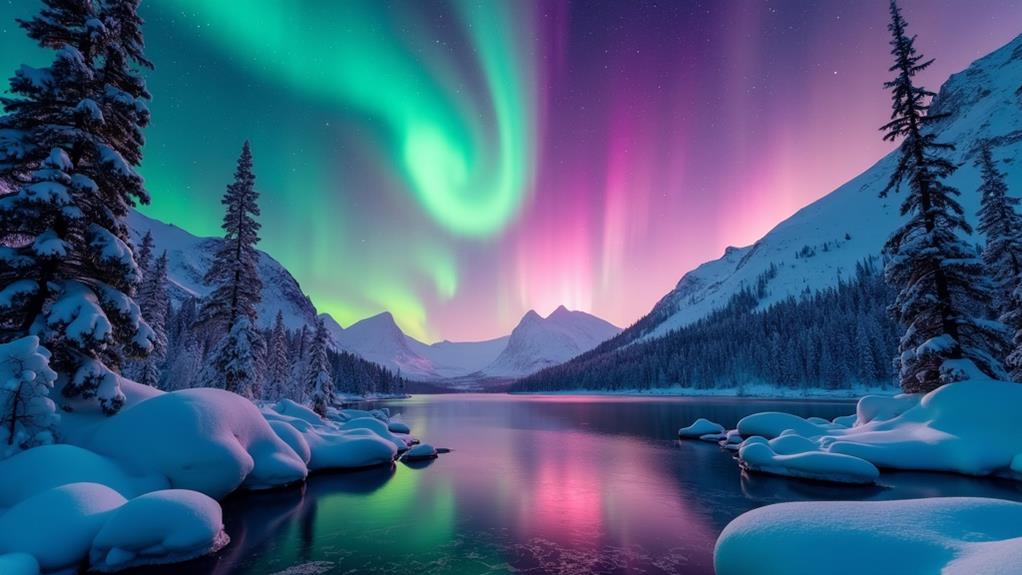
To capture the mesmerizing Aurora Borealis, position yourself in dark, remote locations far from any light pollution that could obscure the natural spectacle. Ideal viewing conditions are vital for experiencing the full beauty of the auroras. Clear skies are essential; even a thin layer of clouds can ruin the view, so always check the weather forecast before heading out.
Timing is key. The best period to observe the northern lights is usually between 10 PM and 2 AM during winter months when the nights are longest and darkest. Solar activity plays a significant role too; high KP index levels, indicating strong geomagnetic storms, often lead to more brilliant and widespread auroras.
Here are some tips to improve your viewing experience:
- Choose dark, remote locations: Avoid areas with light pollution.
- Monitor the KP index: High levels indicate stronger solar activity.
- Pick clear nights: Cloud cover can obstruct your view.
- Time it right: Winter nights between 10 PM and 2 AM are ideal.
- Check weather conditions: Low humidity and stable atmospheric conditions enhance visibility.
With these guidelines, you're well on your way to witnessing a stunning Aurora Borealis display.
Advances in Camera Technology
Modern camera technology, with advanced sensors and high ISO capabilities, allows photographers to capture the aurora borealis with greater detail and light than the human eye can perceive. Long exposure techniques reveal vivid colors and intricate patterns often missed in fleeting moments. These advancements enable photographers to showcase the full beauty of the auroras in their images.
Enhanced Light Sensitivity
Modern cameras, from DSLRs to smartphones, leverage advanced sensors and computational photography to significantly enhance light sensitivity, capturing details in low-light conditions that often surpass human vision. This improved light sensitivity enables cameras to reveal the vibrant colors and intricate details of phenomena like the aurora borealis, which might be missed by the naked eye. High ISO settings boost a camera's ability to detect faint light, revealing subtle hues and nuances. When paired with long exposure settings, these cameras can accumulate more light over time, resulting in images with richer colors and detailed textures.
Additionally, noise reduction algorithms are crucial in preserving the quality of low-light images by minimizing graininess, ensuring the final photo is cleaner and more refined. HDR (High Dynamic Range) techniques further enhance the captured scenes by balancing bright and dark areas, offering a more accurate and lifelike representation of the aurora.
Consider the following benefits modern cameras offer:
- Enhanced light sensitivity: Captures more details in low-light conditions.
- High ISO: Increases light detection capability.
- Long exposure: Allows for richer colors and more intricate details.
- Noise reduction: Enhances image clarity by reducing graininess.
- HDR: Balances bright and dark areas for a more realistic depiction.
Long Exposure Capabilities
Long exposure capabilities have revolutionized aurora photography, enabling cameras to capture the northern lights with unprecedented clarity and detail. By using long exposure settings, typically between 10 to 30 seconds, cameras can gather more light than the human eye can in a fleeting moment. This allows for the capture of vibrant colors and intricate details that are often invisible in real-time.
Modern cameras are equipped with high ISO settings, which enhance their performance in low-light conditions. This feature allows cameras to capture the full spectrum of aurora colors, making the lights appear more brilliant than they do to the naked eye.
Using a tripod is crucial during long exposure photography to stabilize the camera, preventing motion blur and ensuring sharp images of the auroras' dynamic movements and patterns. Advances in camera technology, such as improved sensor sensitivity and noise reduction algorithms, further contribute to producing clearer and more dynamic images.
| Feature | Benefit | Impact on Aurora Photography |
|---|---|---|
| Long Exposure | Captures more light | Reveals vibrant colors and details |
| High ISO | Performs well in low light | Captures a full spectrum of colors |
| Sensor Sensitivity | Improves image clarity | Produces clearer images |
| Noise Reduction | Reduces graininess | Enhances visual impact |
| Tripod Use | Stabilizes camera | Ensures sharp, blur-free images |
Post-Processing Techniques

Capturing the ethereal beauty of the aurora borealis in photographs can be significantly enhanced through post-processing techniques. By adjusting brightness, contrast, and clarity, you can reveal colors and details that may not be discernible to the naked eye. Utilizing software such as Adobe Lightroom or Photoshop to manipulate RAW files allows you to restore lost hues and improve the overall sharpness of your low-light captures.
Here are some key post-processing tips to enrich your aurora images:
- Adjust Brightness and Contrast: Fine-tuning these settings helps balance the light, making the aurora's colors more vibrant.
- Enhance Clarity: Increasing clarity can bring out subtle details in the aurora's structure.
- Use Noise Reduction: High ISO settings can introduce graininess; noise reduction algorithms can clean up your image.
- Apply HDR Techniques: Combining multiple exposures captures the full range of light, balancing both bright and dark areas.
- Avoid Over-Saturation: Enhance the natural beauty without misleading viewers by overdoing the colors.
The goal of post-processing is to enrich the natural beauty of the aurora while maintaining a realistic look. Proper techniques can transform your photos into enchanting, true-to-life representations of this mesmerizing phenomenon.