
How to Create a Backyard Observatory

Creating a backyard observatory starts with selecting an appropriate location, ideally one with minimal light pollution for optimal stargazing. Begin by precisely marking and measuring the area for the foundation, ensuring accuracy for the reinforcement cage and concrete base.
Choose durable materials for the walls, such as treated timber and high-grade lumber. As you build, consider the design of the dome and roof to provide both insulation and easy access to the night sky. Interested in learning the next steps to make your observatory fully operational and welcoming?
Choosing the Location
When selecting the site for your backyard observatory, consider how light pollution will impact your viewing conditions. Choose a spot as far from streetlights and neighboring house lights as possible. Light pollution can significantly reduce the quality of your astronomical observations, so opting for a darker area of your backyard is crucial.
Sturdiness is another essential factor. The ground where you position your observatory must be solid to prevent vibrations that could disrupt your equipment. Look for a location with solid, compressed soil to ensure the ground won't shift or sink over time. Uneven or soft ground can cause your telescope to sway, disturbing your stargazing experience.
Convenience is also important. Select a location easily reachable from your house. You don't want to be hauling heavy equipment across a vast yard every time you wish to observe the night sky. Additionally, consider the proximity to power sources if your equipment requires electricity. A convenient location will enhance your stargazing sessions and make them less burdensome. Balancing light pollution, sturdiness, and convenience will help you create the ideal spot for your backyard observatory.
Preparing the Foundation
When preparing the foundation for your backyard observatory, begin by accurately marking and measuring the designated area. Construct a reinforcement cage to ensure the structure's stability.
Mark and Measure Area
To begin, use a tape measure and spirit level to accurately mark the area for your observatory's foundation. First, measure the dimensions of your planned observatory space with the tape measure.
Once you have the measurements, use marking tools like chalk or spray paint to outline the perimeter on the ground. Ensure your measurements are precise to avoid any issues later on.
Next, drive pegs into the ground at each corner of your marked area. These will serve as reference points. Connect the pegs with string to create a clear boundary line. Use a spirit level to check that the pegs are all at the same height, ensuring a level foundation.
Build Reinforcement Cage
Build a robust reinforcement cage on-site using rebar to ensure your observatory's foundation is stable and durable. Start by laying out the base mesh, securing it with bricks to prevent any movement when pouring concrete. Rebar is essential for adding the necessary strength and stability to the foundation.
Next, use a precision tool, such as a 3D-printed alignment guide, to ensure the rebars are accurately positioned. This accuracy is crucial for maintaining the structural integrity of the concrete pier. Incorporate six M16 threaded rods into the design for additional support, ensuring the observatory remains safe and stable over time.
Consider hiring professionals for the foundation work and landscaping to benefit from their expertise and experience, ensuring a strong and lasting observatory base. A well-constructed reinforcement cage is critical to your observatory's stability, so prioritize getting it right.
Pour Concrete Base
Measure and mark the ground to delineate the precise area where the observatory foundation will be poured. Use a tape measure and a spirit level to ensure accuracy. Once marked, create a form for the concrete base using pegs and shutter boards. Drive the pegs into the ground at the corners of the marked area and attach the shutter boards to form a sturdy frame. Make sure the form is level using the spirit level.
Prepare your mixer and barrow for the job. Gather and organize your materials for the concrete mix. Using a shovel, mix the concrete according to the manufacturer's instructions. Pour the concrete into the form, ensuring an even distribution.
While the concrete is still wet, install a concrete pier in the center of the foundation to support the telescope. Carefully position the pier and use the spirit level to ensure it's perfectly level. Smooth out the surface with your shovel. Allow the concrete to cure as per the manufacturer's instructions. This solid foundation will ensure your observatory stands strong for years to come.
Building the Walls

When constructing the walls for your backyard observatory, start by selecting durable materials that can endure outdoor elements. Use power tools such as a circular saw and router for precise cuts and to maintain structural integrity. Ensure proper wall framing techniques and securely attach hardwood blocks for robust joist support beams.
Wall Framing Techniques
Enhancing the durability and longevity of your backyard observatory begins with using timber treated with a wood preservative for the wall framing. This not only prevents rot and insect damage but also extends the lifespan of your structure.
Effective wall framing techniques are essential once you have your treated timber. First, erect posts with molded strips for cladding, which secure the outer cladding and provide structural support. Next, strategically place hardwood blocks to support joist beams, enhancing stability and ensuring the walls can bear the necessary load. Precision in your cuts and joins is crucial for a sturdy frame, so use power tools like a circular saw and router to achieve clean edges and snug fits.
Key tips to remember:
- Use a wood preservative: Protects your timber from rot and insects.
- Install molded strips: Secures cladding effectively.
- Attach hardwood blocks: Provides additional support for joist beams.
- Utilize power tools: Ensures precision and efficiency in framing work.
Material Selection Tips
Selecting the right materials is crucial for constructing strong, long-lasting walls for your backyard observatory. Start with high-quality lumber known for its durability and ease of handling. Apply a wood preservative to protect the lumber from weather and pests, ensuring the structure's resilience over the years.
Use power tools for precise and efficient cutting and shaping. A circular saw is ideal for making accurate cuts, while a router can smooth edges and create neat joints. These tools streamline the building process, enhancing both speed and precision.
For added stability and visual appeal, set up posts with shaped strips for cladding. Secure joist support beams with hardwood blocks, providing essential stability to withstand various environmental factors.
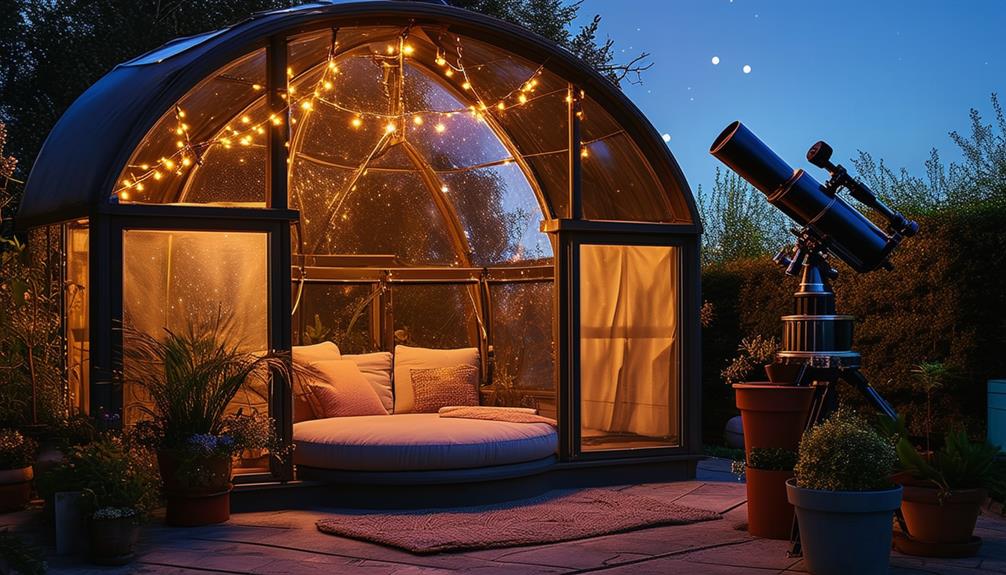
Constructing the Dome
Building the dome begins with creating a double-layer plywood ring, supported by sturdy wooden pegs. This ring forms the foundation of the dome structure.
Next, bend thin plywood around the edge to form the dome's skirt, adding both visual appeal and structural stability. Secure the thin plywood with wood supports to ensure the structure can withstand various weather conditions.
The next step involves the ribs and hardboard panels. Attach the ribs to the plywood ring, spacing them evenly for balanced support. Once the ribs are in place, secure the hardboard panels between them. This completes the main dome structure and provides a solid base for the shutter assembly.
For the shutter assembly, use sliding bolts and long strip hinges. This allows the shutter to open and close smoothly, granting easy access to the night sky. Regularly check the alignment during construction to ensure proper function.
Key steps to remember:
- Craft a double-layer plywood ring supported by wooden pegs.
- Bend and secure thin plywood to form the dome skirt.
- Attach ribs and hardboard panels for structural integrity.
- Install sliding bolts and strip hinges for the shutter assembly.
Following these steps will result in an efficient and durable dome structure.
Installing the Roof
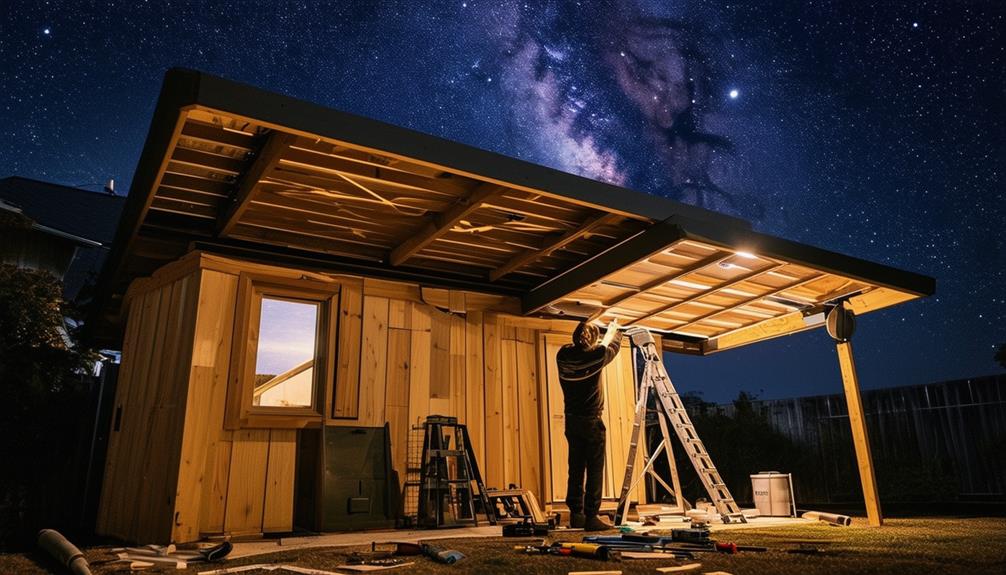
To set up the roof on your backyard observatory, begin by positioning it at a 30-degree angle for optimal protection against the elements. This angle ensures effective coverage and shields your equipment from rain and debris.
Start by securely attaching the roof to the observatory structure using heavy-duty door hinges and friction mechanisms. This setup will keep the roof stable and allow for smooth operation.
Next, cover the roof surface with oriented strand board (OSB) and Tyvek for foundational strength and moisture resistance. On top of that, add corrugated plastic roof panels to enhance durability and provide additional weather protection.
For ease of access, incorporate a 3-by-4-foot access door into your roof design. This door will allow convenient entry and exit without the need to remove large panels. To facilitate the opening and closing of the roof, implement a counterbalance system. Attach ropes to the roof panels, making it easy to maneuver the roof without excessive effort.
Setting Up the Interior
Creating a functional and comfortable interior for your backyard observatory requires thoughtful planning. Begin by installing foam flooring. This not only provides comfort during long observation sessions but also helps protect sensitive equipment if it gets dropped.
Optimize your layout by using roof panels creatively. They're excellent for displaying star charts and notes, allowing you to access vital information easily without cluttering your workspace. Address storage needs by utilizing the spaces between roof joists for items like eyepieces, cables, and manuals. This keeps everything organized and within easy reach.
Adding basic amenities can greatly enhance your observing experience. A plastic cup for writing utensils ensures you always have a pen handy for note-taking. A thermometer helps you monitor the temperature, which can impact your equipment and observations.
To summarize, here's a quick checklist:
- Foam flooring: For comfort and equipment safety.
- Roof panels: Ideal for displaying star charts and notes.
- Storage solutions: Use roof joists for organized storage.
- Amenities: Include a plastic cup for writing utensils and a thermometer.
With careful planning and these tips, you'll create an efficient and inviting space that enriches your stargazing adventures.
Adding Final Touches
Now that your interior setup is complete, let's focus on adding the final touches to ensure your backyard observatory is both secure and fully functional. Start by installing shutter pulleys for smooth dome or roof operation, making opening and closing hassle-free. Use strong hinges and sturdy locks on all doors and access points to keep your equipment safe and secure.
Next, consider your observatory lighting. Opt for red lights, as they're less likely to interfere with night vision. Strategically place power sockets throughout the observatory to accommodate all your devices and equipment, helping to avoid clutter and ensuring smooth operation. Consider laying down a wooden floor, which not only adds a warm aesthetic but also provides a stable surface for your telescope and other equipment.
Ensuring Functionality
Optimizing your backyard observatory for smooth operation requires careful attention to stability and alignment. A stable location is crucial to avoid vibrations that can affect your observations. Using concrete piers for your telescope mount ensures a solid foundation and simplifies alignment, preparing you for hassle-free observing.
Maximize your observing time by focusing on precise alignment. Well-aligned equipment leads to accurate observations and reduces time spent on adjustments. Equatorial wedges can streamline this process, making setup quicker and more efficient.
Design the observatory walls to prevent the telescope from pointing too low in any cardinal direction, ensuring optimal viewing angles. Additionally, covering your observatory protects your equipment from weather elements and enhances the overall experience.
Here's a quick checklist to ensure functionality:
- Stable location: Choose a spot free from vibrations.
- Concrete piers: Provide a solid foundation and facilitate easier alignment.
- Alignment accuracy: Essential for precise observations and maximizing observing time.
- Equatorial wedges: Simplify setup and improve efficiency.
- Observatory walls: Design to ensure ideal viewing angles and protect equipment from weather elements.
Conclusion
You now have all the essentials to build a backyard observatory. By selecting an optimal location, laying a solid foundation, constructing sturdy walls, and installing an insulated, angled roof, you're setting up for stargazing success. Remember to design the interior for maximum efficiency and add final touches like red lighting and a wooden floor. With some effort, you'll soon be exploring the night sky from the comfort of your own backyard. Enjoy!